《VC++课程设计》
题目一:计算器
学院:XXXXXXX
班级:XXXXXXX
学号:XXXXXXX
姓名:XXXXXXX
设计时间:XXXXXXX
目录:
1.需求分析--------------------------------------------- 1
2.课题设计内容--------------------------------------- 1
(1)课程设计基本流程------------------------------------------ 1
(2)详细设计说明------------------------------------------------ 2
(3)设计流程图--------------------------------------------------- 13
(4)主要程序------------------------------------------------------ 14
(5)运行结果截图-----------------------------------------------
3.得意之处--------------------------------------------- 14
4.设计实践过程中的收获与体会------------------ 14
5.设计目前存在的问题-------------------------- 15
6.主要参考文献--------------------------------------
一、 需求分析
本课程主要是完成一个简单计算器的设计,要求用户在使用时可以准确显示整数及小数,并准确进行加、减、乘、除、幂运算,最后实现清零和退出。
二、 课程设计内容
1、 课程设计基本流程:
首先是进行MFC基本对话框的创建,然后设计界面,界面上包括数字按钮、等号按钮、小数点按钮、运算按钮、退出按钮、清零按钮和编辑框。并对各个按钮和编辑框的地址、标题进行更改,绑定变量。最后,建立函数,完成代码的编写,实现程序。
2、 详细设计说明:
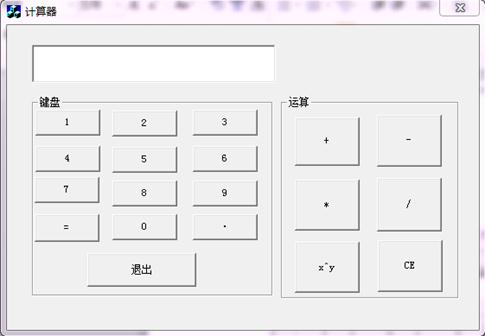
完成MFC基本对话框的创建后,进行界面设计。在界面的左上方设置编辑框,在其属性里将地址改为result,绑定变量名称为m_result,类型为String型。
界面左面为数字键盘,右面为运算符号。然后对两部分分别进行组框。对各个按钮地址进行名称、地址更改。再建立类向导,在Message Maps的Messages中选中BN_CLICKED,点击确定,完成绑定变量。
双击各个按钮,建立函数,添加代码,实现数字按钮的执行与运算符按钮的执行。
以下是对应控件:
ID 对应控件
IDC_1 1
IDC_2 2
IDC_3 3
IDC_4 4
IDC_5 5
IDC_6 6
IDC_7 7
IDC_8 8
IDC_9 9
IDC_0 0
IDC_dengyu dengyu
IDC_dian dian
IDC_jia jia
IDC_jian jian
IDC_cheng cheng
IDC_chu chu
IDC_mifang mifang
IDC_qingling qingling
IDC_tuichu tuichu
IDC_result result
3、 设计流程图:

4、 主要程序:
// 计算器Dlg.cpp : implementation file
//
#include "stdafx.h"
#include "计算器.h"
#include "计算器Dlg.h"
#ifdef _DEBUG
#define new DEBUG_NEW
#undef THIS_FILE
static char THIS_FILE[] = __FILE__;
#endif
double i;//代表不同于m_result的变量,主要用于运算
int j;//定义整型变量j,并在输入运算符时赋值
/////////////////////////////////////////////////////////////////////////////
// CAboutDlg dialog used for App About
class CAboutDlg : public CDialog
{
public:
CAboutDlg();
// Dialog Data
//{{AFX_DATA(CAboutDlg)
enum { IDD = IDD_ABOUTBOX };
//}}AFX_DATA
// ClassWizard generated virtual function overrides
//{{AFX_VIRTUAL(CAboutDlg)
protected:
virtual void DoDataExchange(CDataExchange* pDX); // DDX/DDV support
//}}AFX_VIRTUAL
// Implementation
protected:
//{{AFX_MSG(CAboutDlg)
//}}AFX_MSG
DECLARE_MESSAGE_MAP()
};
CAboutDlg::CAboutDlg() : CDialog(CAboutDlg::IDD)
{
//{{AFX_DATA_INIT(CAboutDlg)
//}}AFX_DATA_INIT
}
void CAboutDlg::DoDataExchange(CDataExchange* pDX)
{
CDialog::DoDataExchange(pDX);
//{{AFX_DATA_MAP(CAboutDlg)
//}}AFX_DATA_MAP
}
BEGIN_MESSAGE_MAP(CAboutDlg, CDialog)
//{{AFX_MSG_MAP(CAboutDlg)
// No message handlers
//}}AFX_MSG_MAP
END_MESSAGE_MAP()
/////////////////////////////////////////////////////////////////////////////
// CMyDlg dialog
CMyDlg::CMyDlg(CWnd* pParent /*=NULL*/)
: CDialog(CMyDlg::IDD, pParent)
{
//{{AFX_DATA_INIT(CMyDlg)
m_result = _T("");
//}}AFX_DATA_INIT
// Note that LoadIcon does not require a subsequent DestroyIcon in Win32
m_hIcon = AfxGetApp()->LoadIcon(IDR_MAINFRAME);
}
void CMyDlg::DoDataExchange(CDataExchange* pDX)
{
CDialog::DoDataExchange(pDX);
//{{AFX_DATA_MAP(CMyDlg)
DDX_Text(pDX, IDC_result,m_result);
//}}AFX_DATA_MAP
}
BEGIN_MESSAGE_MAP(CMyDlg, CDialog)
//{{AFX_MSG_MAP(CMyDlg)
ON_WM_SYSCOMMAND()
ON_WM_PAINT()
ON_WM_QUERYDRAGICON()
ON_BN_CLICKED(IDC_1, On1)
ON_BN_CLICKED(IDC_2, On2)
ON_BN_CLICKED(IDC_3, On3)
ON_BN_CLICKED(IDC_4, On4)
ON_BN_CLICKED(IDC_5, On5)
ON_BN_CLICKED(IDC_6, On6)
ON_BN_CLICKED(IDC_7, On7)
ON_BN_CLICKED(IDC_8, On8)
ON_BN_CLICKED(IDC_9, On9)
ON_BN_CLICKED(IDC_0, On0)
ON_BN_CLICKED(IDC_dengyu, Ondengyu)
ON_BN_CLICKED(IDC_dian, Ondian)
ON_BN_CLICKED(IDC_jia, Onjia)
ON_BN_CLICKED(IDC_jian, Onjian)
ON_BN_CLICKED(IDC_cheng, Oncheng)
ON_BN_CLICKED(IDC_chu, Onchu)
ON_BN_CLICKED(IDC_mifang, Onmifang)
ON_BN_CLICKED(IDC_qingling, Onqingling)
ON_BN_CLICKED(IDC_tuichu, Ontuichu)
ON_EN_CHANGE(IDC_result, Onresult)
//}}AFX_MSG_MAP
END_MESSAGE_MAP()
/////////////////////////////////////////////////////////////////////////////
// CMyDlg message handlers
BOOL CMyDlg::OnInitDialog()
{
CDialog::OnInitDialog();
// Add "About..." menu item to system menu.
// IDM_ABOUTBOX must be in the system command range.
ASSERT((IDM_ABOUTBOX & 0xFFF0) == IDM_ABOUTBOX);
ASSERT(IDM_ABOUTBOX < 0xF000);
CMenu* pSysMenu = GetSystemMenu(FALSE);
if (pSysMenu != NULL)
{
CString strAboutMenu;
strAboutMenu.LoadString(IDS_ABOUTBOX);
if (!strAboutMenu.IsEmpty())
{
pSysMenu->AppendMenu(MF_SEPARATOR);
pSysMenu->AppendMenu(MF_STRING, IDM_ABOUTBOX, strAboutMenu);
}
}
// Set the icon for this dialog. The framework does this automatically
// when the application's main window is not a dialog
SetIcon(m_hIcon, TRUE); // Set big icon
SetIcon(m_hIcon, FALSE); // Set small icon
// TODO: Add extra initialization here
return TRUE; // return TRUE unless you set the focus to a control
}
void CMyDlg::OnSysCommand(UINT nID, LPARAM lParam)
{
if ((nID & 0xFFF0) == IDM_ABOUTBOX)
{
CAboutDlg dlgAbout;
dlgAbout.DoModal();
}
else
{
CDialog::OnSysCommand(nID, lParam);
}
}
// If you add a minimize button to your dialog, you will need the code below
// to draw the icon. For MFC applications using the document/view model,
// this is automatically done for you by the framework.
void CMyDlg::OnPaint()
{
if (IsIconic())
{
CPaintDC dc(this); // device context for painting
SendMessage(WM_ICONERASEBKGND, (WPARAM) dc.GetSafeHdc(), 0);
// Center icon in client rectangle
int cxIcon = GetSystemMetrics(SM_CXICON);
int cyIcon = GetSystemMetrics(SM_CYICON);
CRect rect;
GetClientRect(&rect);
int x = (rect.Width() - cxIcon + 1) / 2;
int y = (rect.Height() - cyIcon + 1) / 2;
// Draw the icon
dc.DrawIcon(x, y, m_hIcon);
}
else
{
CDialog::OnPaint();
}
}
// The system calls this to obtain the cursor to display while the user drags
// the minimized window.
HCURSOR CMyDlg::OnQueryDragIcon()
{
return (HCURSOR) m_hIcon;
}
void CMyDlg::On1()
{
// TODO: Add your control notification handler code here
m_result+="1";
UpdateData(false); //数据的更新
}
void CMyDlg::On2()
{
// TODO: Add your control notification handler code here
m_result+="2";
UpdateData(false);
}
void CMyDlg::On3()
{
// TODO: Add your control notification handler code here
m_result+="3";
UpdateData(false);
}
void CMyDlg::On4()
{
// TODO: Add your control notification handler code here
m_result+="4";
UpdateData(false);
}
void CMyDlg::On5()
{
// TODO: Add your control notification handler code here
m_result+="5";
UpdateData(false);
}
void CMyDlg::On6()
{
// TODO: Add your control notification handler code here
m_result+="6";
UpdateData(false);
}
void CMyDlg::On7()
{
// TODO: Add your control notification handler code here
m_result+="7";
UpdateData(false);
}
void CMyDlg::On8()
{
// TODO: Add your control notification handler code here
m_result+="8";
UpdateData(false);
}
void CMyDlg::On9()
{
// TODO: Add your control notification handler code here
m_result+="9";
UpdateData(false);
}
void CMyDlg::On0()
{
// TODO: Add your control notification handler code here
m_result+="0";
UpdateData(false);
}
void CMyDlg::Ondengyu()
{
// TODO: Add your control notification handler code here
double k=0;
switch(j)
{
case 1:
k = i + atof(m_result);
break;
case 2:
k = i- atof(m_result);
break;
case 3:
k = i * atof(m_result);
break;
case 4:
if (atof(m_result)!=0)
{
k = i / atof(m_result);
break;
}
else
{
MessageBox("can't use zero!");
}
case 7:
{
double m=atof(m_result);
k=1;
for(m;m>=1;m--)
{
k=k*i;
}
break;
}
}
char cRet[50];
memset(cRet,0,50);
sprintf(cRet,"%f",k);
m_result = cRet;
UpdateData(FALSE); //所有iQian与iType清0
i=0;
j=0;
m_result="";
return;
} //等于号中定义了一个整形变量j,并在输入运算符的时候赋值,用switch语句选择运行的运算,编程序进行运算并在编辑框显示出来运算结果。函数则不用点等于号直接显示结果。
void CMyDlg::Ondian()
{
// TODO: Add your control notification handler code here
m_result+=".";
UpdateData(false);
}
void CMyDlg::Onjia()
{
// TODO: Add your control notification handler code here
i=atof(m_result);//实现字符串到double的转换
j=1;
m_result+="+";
m_result="";
UpdateData(false);
}
void CMyDlg::Onjian()
{
// TODO: Add your control notification handler code here
i=atof(m_result);
j=2;
m_result+="-";
m_result="";
UpdateData(false);
}
void CMyDlg::Oncheng()
{
// TODO: Add your control notification handler code here
i=atof(m_result);
j=3;
m_result+="*";
m_result="";
UpdateData(false);
}
void CMyDlg::Onchu()
{
// TODO: Add your control notification handler code here
i=atof(m_result);
j=4;
m_result+="/";
m_result="";
UpdateData(false);
}
void CMyDlg::Onmifang()
{
// TODO: Add your control notification handler code here
m_result+="^";
i=atof(m_result);
m_result="";
j=7;
UpdateData(false);
}
void CMyDlg::Onqingling()
{
// TODO: Add your control notification handler code here
m_result="";
UpdateData(false);//编辑框的清空
}
void CMyDlg::Ontuichu()
{
// TODO: Add your control notification handler code here
CDialog::OnCancel();//程序的退出
}
void CMyDlg::Onresult()
{
// TODO: If this is a RICHEDIT control, the control will not
// send this notification unless you override the CDialog::OnInitDialog()
// function and call CRichEditCtrl().SetEventMask()
// with the ENM_CHANGE flag ORed into the mask.
// TODO: Add your control notification handler code here
}
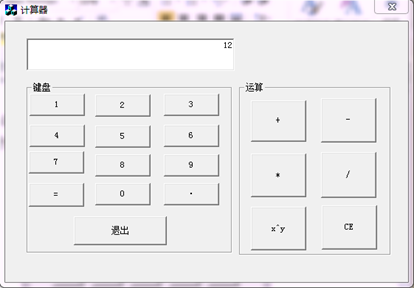
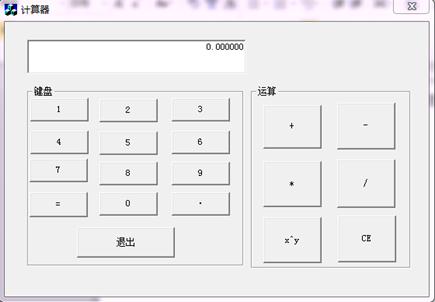
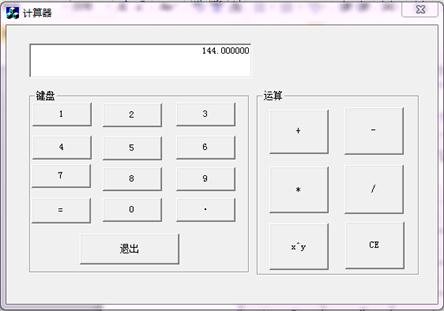
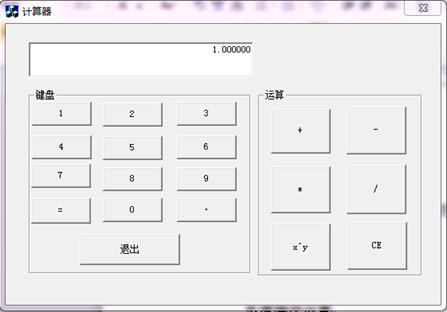
5、 运行结果截图:
(1)、实现数字的显示
(2)、以12“x”12为例
实现加法运算

实现减法运算
实现乘法运算
实现除法运算
实现幂运算

实现小数运算(1.2*1.2)

编辑框清零
三、 得意之处
这次实验做得是相对简单一些的计算器,虽然做得计算器比较简单,但是每个函数的编写都是花了很大的心思的。之前有去过图书馆查资料、也上网看到了一些,但有很多地方还是不太明白,有些语句通过自己能理解的方式进行了改进,比如选择语句、小数点的编写、幂函数的编写等,最终将完美的结果呈现出来。在编写过程中,我很得意的自己编写了一些函数,并用到了开关语句。当运行出现bug后,自己又认真修改,解决问题,心情非常喜悦。
另外,我最满意的地方就是输入数字的时候可以很明确的看到输入了什么,准确进行加、减、乘、除、幂运算,最后实现了清零和退出。整个界面设计的简单但不失美观,同时方便用户的使用,则加了友好性。
四、 设计实践过程中的收获与体会
这一个星期的课程设计中,确实让我增长了不少,也发现自己对于MFC的只是有很多掌握的不够,学得不好。做计算器实验之前我又把自己把课件上的前几张有关的程序全部自己编织运行了一遍。
对于:
char cRet[50];
memset(cRet,0,50);
sprintf(cRet,"%f",k);
m_edit = cRet;
UpdateData(FALSE);
这个程序不太会用,还是同学给讲解的。
等于号这个创意是和同学一起研究出来的,发现自己又要去重新复习一下C++的知识。这个程序觉得最好的地方还是自己编写的一些函数的程序,比如数字的显示和符号的运算,然后自己添加了退出程序,可以使用户不想用时退出界面。
开始编完的时候出现了很多bug,但是经过努力和同学的帮助还是总算没有bug了。
五、 设计目前存在的问题
程序还有很多不足,比如计算器太过简单,只能进行一些简单的计算。由于时间问题,科学计算没有去更深的研究。其实自己很想再编写一下,能够进行一次运算之后再继续进行运算。比如:算完1+1=2后,我输入+号能不更新编辑框,继续+2=4。希望以后有时间能更深的研究出一个更好的计算器吧。
六、 主要参考文献
《MFC编程技巧与范例详解》清华大学出版社
《VC++课程设计教程》清华大学出版社